
I’m a geek, you’re a geek, we’re all geeks.
And geeks alter their gear. Change them. Modify them.
Here are some small mods made to our IBM Model M keyboard that was recently converted to USB.
Click here for more articles on retro computers, and here for articles about keyboardsOf course, there was the whole cleaning. The keyboard had accumulated quite a lot of dirt over the years.

We mentioned before how to clean retro keyboards and how a clean keyboard increases look and feel. Luckily, the way the metal backplane and buckling springs are assembled often lead to no big issues with the membrane, so a full disassembly wasn’t required – a good thing on Model M as they are riveted together. Several Model M have passed trough a screw mod, which is intense, and wasn’t required in this case.

As seen, a deep cleaning of the exterior and interior was much needed.
WIN
Something else that happened is that we remapped the supplemental key of our ISO model M to be used as a modern replacement for the Application key (that’s the name for the windows key) – useful for Windows-L or other shortcuts. All of them could be done with Windows replaced by CTRL-ESC, but it is convenient and was available…
Modern-day Unicomp keyboards do include modern keys including the Windows key that IBM never added to the Model M, and they are available from various sources online.
There are also fully custom-made “artisan” buckling-spring keys available at multiple places such as Etsy, but pricing is higher; plus one requires to actually have something custom to put on the key. We opted for a simple windows logo key.
The Unicomp keys aren’t two part key/cap, but the complete key is compatible with classic model Ms.
That being said, the height is just a bit lower and the profile isn’t the same. OK for the added function of an application key, but mixing alpha keys or number keys between classic and modern caps might be annoying.


The coloration of the modern key also differ slightly from the original one, which isn’t an issue but is still not pleasant.
Ribbon cable?
During installation of the controller, we noticed an issue with the LED ribbon cable. The ribbon cable had lost conductivity and LEDs wouldn’t always light up – or at all. Therefore we changed the cable and connectors altogether. It is less authentic, but it works perfectly.

LEDs
While in there we changed the LEDs. This specific model M had round 5mm green LEDs – see above. It shimed anoyingly trough the bezel and we wanted to give it a better look.

Some geeks and modders go for blue LEDs, but the look and feel of this keyboard is just great with amber. Also, the bezel for the LEDs has provision for a rectangle indicator; it therefore made sense to put rectangular LEDs in place of the round ones.
Jumpers?
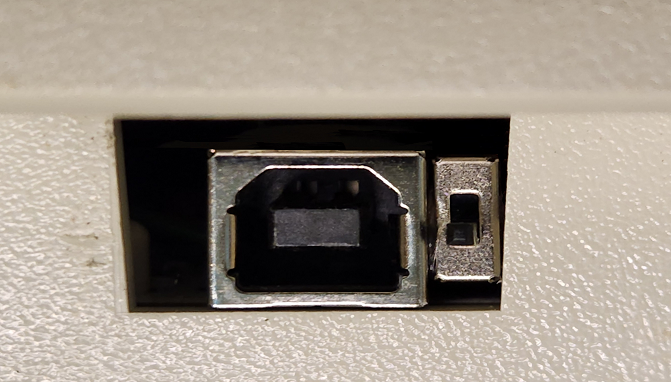
The next change is more related to the Model H controller board itself – In the original Model H board design, the USB-B connector is surrounded with a 3d printed plug to fill the gap – we didn’t install that.
An easy way to boot the controller in DFU mode to reflash the firmware is to change the jumper settings. What we did is expose this jumper set to the outside world trough a tiny switch. It was useful while developing and testing the ISO variants of the Vial firmware as we needed to work out the visuals for the ISO layout.
As with anything, the power is with those who dare make something their own.
Keep on modding.
Related articles
Model M convertion to USB (wereallgeeks)
Clean retro keyboards (wereallgeeks)
Model M screw mod (wikihack)
Vial-QMK firmware (GitHub)

