I’m a geek, you’re a geek, we’re all geeks.
And geeks like their gear.
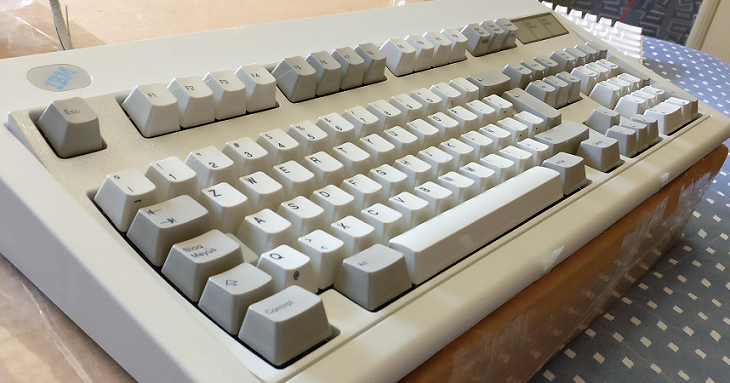
When it comes to keyboards, the best-designed touch-typist keyboard ever made happens to be the IBM Model M.
Well, in theory, it is debatable: some stating the IBM Model F was better. It did come first. But seing how the Model M was meant to replace the Model F [in a more affordable way] and ended up being much more popular, likely because of its form factor that defined the standard PC keyboard layout or the fact it is indestructible.
The model M layout was standardized by ISO in 1994 and ANSI in 1998, with minor additions—most notably the windows and Menu keys.
It is OK to say the model M was the summum keyboard to get.
In any case, they both were utilising the same hardware key switch, which is what optimised the hear-and-feel that made both keyboards so great to use.
Buckling?
The IBM model M was introduced in 1985 and uses a buckling spring type of keyswitch. It is not purely a mechanical keyboard but isn’t either a purely membrane keyboard. The audible buckling spring makes for a great typing feeling and good auditory feedback.


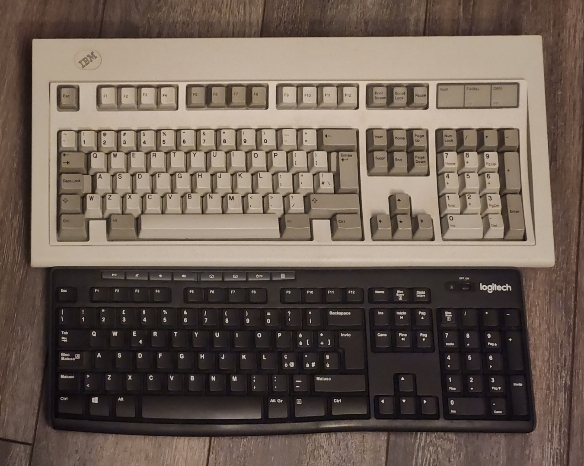
Aditionally, those keyboards are sturdy – a metal frame protects the keyswitch. They are built like tanks and weights in at about 5 lbs (2.25kg) so even after nearly 40 years, they are generally in excellent shape.

The keycaps are 2-parts, meaning the actual key that is used to buckle the spring is one thing, but the cap is changeable too. That made useful for commercial point of sales, and jokes in college. But also flexible for custom keyboards.


Also, they do not yellow with age. They may have scuffs or marks, but even after 40 years they aren’t yellow.
Difference between mechanical switch and buckling spring
Model F and M are -not- mechanical keyboards.
It isn’t a mechanical switch, but a buckling spring. The contacts on a buckling springs are at the foot of the spring which keeps the key in its upward,position. When pushed down, the spring bends [buckles] and the feet enter contact with the bottom PCB to tell the computer a key is pressed.
For a mechanical key switch, the contacts are released by the movement of the spring-loaded plunger. There is a great article on Popular Mechanics about the differences, where they talk about replica Model F keyboards.

Buckling Spring and Cherry MX blue mechanical switch
To many, the mechanical keyswitch are just a way to recreate something similar to the optimal comfort of a buckling spring.
While buckling springs make for an awesome feel, the spring needs to be fully extended to reset, so from pressed to unpressed is a slower process than with mechanical keyswitch, which in turn makes for poor gameplay. The matrix nature of the controller also allows ghosting wich doesn’t help gamers either.
Model Ms are excellent programmer keyboards.
So why aren’t more people using them?
Being created in early 1980s, they were meant for AT keyboard connection, and evolved to PS/2 keyboard DIN, both of which are not hot-swappable, and rarely installed on modern laptop computers.

Today we explore alternate controllers for the IBM Model M keyboard that will enable the keyboard to be compatible with modern-day USB.
Click here for more articles on retro computers, and here for articles about keyboardsThe Model M is technically still in production today.
Being Originally produced by IBM for the domestic and commercial market as early as 1985, the Model M series was divested during 1991 into a keyboard production operation under the name Lexmark, which continued to manufacture Model M keyboards for IBM and those keyboards were bundled with point of sales or domestic computers.

Lexmark made several minor cost reduction changes such as lightening the case and metal backplate, ending the two-tone key ‘legend’ and removing the connector in favor of a fixed cable. They also reduced the size of the controller board and removed the endge connectors and ribbon cables. It is considered that this change ended the classic era of the Model M.
When the Lexmark-IBM 5 year contract ended in 1996, Lexmark decided to exit the keyboard business, selling some assets to Maxi-Switch, and others back to IBM wich turned around and produced buckling-springs again until 1999, while Maxi Switch produced IBM Enhanced Keyboard with trackpoints until 1998.
But some of Lexmark‘s keyboard manufacturing assets were sold to a group of employees, who formed Unicomp to produce a reduced version of Model Ms with the aging IBM tooling. In 2020 they updated their manufacturing to produce a New Model M with greater quality, but still not as sturdy and comfortable as the Model M of the classic era. But they are USB buckling spring keyboards that has all the keys of a modern-day keyboard, and are still available.
All being said, the classic era Model M being the tank that they are and being very comfortable to use still have appeal for geeks and typist of all kinds.
And geeks from everywhere are converting their Model M to USB one way or another. Let’s see how.
Means to convert to USB
There are AT- and PS/2- converters to modern USB. Some are quite efficient.
A popular choice is the Soarer’s converter. It is an adapter that goes between the keyboard and computer, and does the conversion between the old and new standard. Key mapping can even be changed with it.

While this kind of converter is easy and versatile, it is not as neat as having the controller board modernized. It does add one cable to the contraption. Also the nature of a converter do add latency to the whole experience, which is why serious users prefer otherwise.
With time came several conversions. Most changed the Model M controller to a UBS one, such as this one from 2016 on the blog of lmorchard.

Others focused on making the model M Bluetooth compatible. But…the Model M is kinda bulky at 5lbs to be called portable.
There is Michael Schwingen who made a USB controller for Model M.
There is the commercial MStar conversion board sold as a kit.
There are models that converts to USB-C such as this one by ashpil. USB-C might be great for power applications, but the connector isn’t as heavy duty as the USB-B of most of the Model M conversion control boards – reason is, Model M is very bulky, so a bulky connecter makes sense.

Lots and lots of convertion boards and kits are available for those looking for one.
The USB controller we will look at today was designed by John Hawthorn from Victoria, Canada. He called it Model H (for Hawthorn) and it is completely open source. The PCB is available on Git, so is the QMK firmware that goes with it. The end result is very affordable yet very functionnal. QMK keyboards are very customizeable which makes them popular. More about that below.
John began with a design using an Atmel microcontroller and then made a second version using an STM32 ARM because it had more input pins – prototyping with a Blue Pill STM32 ARM development board, then making a full fledged circuit board. The process is described on his blog.
For more information on the Blue Pill STM32 ARM development board see this article on electronicshub.org
Model H has been cloned and forked a lot on Git because of its open-source nature and flexibility. Some of the branches added features or fixes, others added documentation. Jerome Berclaz documented the process of having the PCBs manufactured from JLCPCB (no affiliations) and the initial flashing of the board.
Jerome explained the process very well so we won’t go into details of how to obtain inexpensive model H circuit boards, just follow his lead.
We did the same process, with help from Jerome's GIT instructions, but also other sources described below. Here are our notes on how to achieve a complete and working Model H converted Model M keyboard.For some reason, when we ordered PCBs, they didn’t let us select the economic SMD assembly described by Jerome, the option available to us drastically increased price. We opted to just hand-solder the SMDs… which isn’t a task for novice solderer. Geeks Beware. Some parts are 0403, measuring about 0.45mm by 0.3mm.

Any geek willing ennough to hand-solder the surface mounts would need theese SMD parts:

The priciest part is the STM32 chip, at about 10$ at Mouser but also available cheaper at other online sources such as your favorite auction site.
Parts placement isn’t described on the solder mask, but can be extrapolated from the 3D process on the PCB website. here’s what goes where:

With a magnifying glass, tweezers, flux, and a fine point soldering iron; it can be done and takes about an hour per board depending on skills and tools.
Here’s a pin-matching representation of the board to assist in debugging ifever it is needed.

Once SMD is all assembled, it should look like this:

This is how it would come from the factory with SMD assembly included. The trough-hole still needs to be soldered before the board is complete:

Disregard the wrongly positionned jumper.
Once built, it is essentially a Blue Pill ARM development board with the wiring pre-done for a model M.
But the STM32 microcontroller of the blue pill does not have a USB bootloader and won’t connect USB without one. It is up to us to install one.
To this end, we require a ST-Link dongle, also available from the same online sources as the STM32 chip

It can be used with the STM32 ST-Link utility to flash the device.
The process is described on this video
While the video is with a bluepill, the same applies to the newly built model H.
Here is the pinout of the debug port, which does not match the ST-Link Dongle’s pinout directly.

The bootloader can be obtained from STM32duino, as described on the GIT of Roger Clark, of Melbourne in Australia. He has a repo aptly named Flash bootloader for Cheap STM32F103C8T boards (BluePill board) and points to prebuilt binaries of the bootloader.
The one that worked for us is generic_boot20_pc13.bin and flashing is exactly as described in the video, using ST Link.
To flash, 4 wires are needed between the controller board and the dongle. 3.3V (do not confuse with 5V) GND, SWDIO and SWCLK. Only the dongle needs to connect to the host computer, but the Boot0 and Boot1 jumpers are to be set to active 1 (3.3v) which is the position closer to the reset switch on the Model H board.


not shown, but both Boot0 and Boot1 are to be set down for bootloader flashing
Once flashed, it is OK to connect the Controller trough its own USB. However, Windows will see a USB device, named Maple03, which won’t correctly connect.
What is maple?
As Roger Clark explained, the bootloader that works for the BluePill is a Maple bootloader that originates from Leaflabs and is intended as an Bootloader firmware for the Maple ARM Cortex-M3 development board. Once flashed, they are USB compliant but the host computer needs the driver. This driver will only be required to flash the keyboard into the controller board, once the keyboard is flashed and boots as a keyboard, nothing Maple or Bluepill will be required to use the keyboard.
The Maple drivers are also part of the STM32duino package that needs to be commandline executed as admin, Thanks again Roger Clark for the explanations.

Once drivers OK, detects as Maple DFU

At this point, we have a controller (Maple DFU) board that is detected by the computer. But what we want is a keyboard.
So, we need to program the controller board to talk keyboard. It is a microcontroller, so we can program it do to whatever we want.
This is where the keyboard firmware enters the game. There are several keyboard firmwares and/or framework to make them. Most of the current user-made keyboards of recent time are using firmwares like TMK, QMK or Vial-QMK.
TMK was originally developped by Hasu from Tokyo, Japan and is described as Keyboard firmwares for Atmel AVR and Cortex-M. It is meant for Mechanical Keyboards or keyboard protocol adapters.
From TMK forked QMK, dubbed the Quantum Mechanical Keyboard. It is versatile and easy to build/maintain so have become wildly popular in the Mechanical Keyboard Scene.
Then came Vial, which forked from QMK to offer the same functionality, but with a protocole for a graphical interface software configurator – removing the need to reflash the controller anytime one wants to change functionalities such as macros or keymap – it makes the keyboard quite versatile.
There is an interesting articled called “What are VIA and QMK for Mechanical Keyboards?” on kinetic lab about the VIA(L) and QMK firmwares.
One can build said firmware as they are open-source and available on GIT, or pick a pre-made binary. Model H variants are available on many sites, including Jerome’s GIT:
To flash the firmware into the Maple DFU recognized board, one needs DF-Util.
It offers a program which can be run from the command line. When called with parameters we can ask about what memory banks are available or install a binary file. On the Model H, there was two available addresses, and -a 2 worked for us with the .bin specified above (we tried both the QMK and Vial ones)
dfu-util -D binary file -a 2
The “download” ends before 100% but all is good
Once flashed and reset [with the pushbutton] the controller was detected as IBM Model M. Alternatively disconnect and set jumpers before reconnecting.

At this point, the keyboard began to work.
But there was still an issue…
Our specific model M keyboard is ISO and not ANSI like most american model M, so the QMK firmware did not recognize some keys.

ISO and ANSI are mechanical layout of keyboard – as opposed to AZERTY, QWERTY and DVORAK that are keymap layout. An ISO keyboard does not have exactly the same physical keys as an ANSI one.
There is an interesting article about ANSI and ISO on SwitchAndClick. Except we don’t agree with the conclusion that ISO isn’t the best of the two layout… In reality, it is a matter of habits and preferences…
Nevertheless, a need for an ISO QMK Model H firmware was there.
So we forked the QMK-Firmware and Vial-QMK to make an ISO variant of both, and made the binaries available
We use the .bin, but the .hex are also present.
Alternatively, the QMK variant (non-Vial) of the Model H firmware could be compiled from the QMK Configurator website, there is Model H in there which includes the ANSI and ISO layouts – once the desired layout is filled, it can be compiled (take a short while) and the custom firmware downloaded.


This of course remove the capability to do any of the Vial setup, but anyone who wants to customize a Model H with no Vial and not have to care for compilation, this is the way to go.
Vial have a similar feature to customize the keyboard, except the new layout, or added macro, are instantly available to the keyboard without reflashing. Makes it very useful to program macros on the go.
We personally like the Vial firmware but to each geek their own preferences.
The finalized keyboard isn’t just great to use, but looks great too.


Keep it retro!
Related articles
IBM Model M keyboard (wikipedia)
IBM Model F keyboard (wikipedia)
AT Keyboard connection (PC Mag)
The best keyboard ever (Popular Mechanics)
USB model M conversion (lmorchard.com)
Michael Schwingen Model M USB (schwingen.org)
MStar (level1tech)
Ashpil’s USB-C Model M (GitHub)
Bluefruit Model M (adafruit)
Model H (modelh.club)
Model H PCB (GitHub)
Model H QMK Firmware (GitHub)
Blue pill development board (stm32 world wiki)
Model H: IBM Keyboard USB conversion (johnhawthorn.com)
Getting started with the blue pill (electronicshub.org)
JBerclaz’s fork of Model H (GitHub)
STM32 ST-Link utility (ST microelectronics)
Flashing Bootloader for Bluepill (GitHub)
What are VIA and QMK for Mechanical Keyboards? (kineticlab)
DF-UTIL (sourceforge)
ANSI vs ISO: explained (Switch And Click)
Forked QMK-Firmware (GitHub)
Forked Vial-QMK (GitHub)
QMK Configurator Website (qmk.fm)

